Built-in ovens have become one of the most popular kitchen upgrades for homeowners. They save space, create a sleek modern design, and offer the convenience of eye-level cooking. But while the end result is stylish and functional, the installation process requires preparation and the right tools. If you’re considering a built in oven installation, one of the first questions you might ask is: What tools are required for installing a built-in oven?
Let’s break it down step by step so you understand exactly what’s involved in the process.
Essential Tools for Built-In Oven Installation
1. Measuring Tape
Before starting, correct measurements are critical. A measuring tape ensures your new oven suits appropriate into the cupboard cutout. You’ll want to measure:
- Width, height, and depth of the current space.
- Clearances required for ventilation.
- The distance to the electrical outlet.
Failing to measure top can lead to problems for the duration of installation—or worse, shopping for an oven that doesn’t fit.
2. Screwdrivers (Flathead and Phillips)
Most built-in ovens require screws to be eliminated or tightened all through installation. Having each flathead and Phillips screwdrivers on hand lets in you to:
- Secure the oven brackets.
- Tighten electrical connections.
- Adjust cupboard fittings if needed.
A set of insulated screwdrivers is advocated for security when working round electrical connections.
3. Power Drill and Drill Bits
A strength drill makes it a great deal less difficult to impenetrable your oven to the cabinetry. You’ll in all likelihood want to drill pilot holes for mounting screws or alter current cabinetry to accommodate the new oven.
Pro tip: Keep a range of drill bits available, as cupboard wood, metallic brackets, and mounting plates can also all require one-of-a-kind sizes.
4. Level
A built-in oven need to sit down flawlessly degree for security and performance. A carpenter’s stage ensures the oven is now not tilted, which can have an effect on cooking outcomes or motive useless stress on the hinges and door.
Some experts additionally use laser ranges for extra unique alignment, particularly in high-end kitchens the place aesthetics depend as an awful lot as function.
5. Pliers and Wire Strippers
If your oven connects immediately to the electrical furnish (instead of a plug), pliers and wire strippers are imperative for getting ready wires. They permit you to:
- Strip insulation from electrical wires.
- Securely twist wires collectively with connectors.
- Adjust or reduce wires to the acceptable length.
6. Voltage Tester or Multimeter
Safety is necessary when working with home equipment that run on 220–240 volts. A voltage tester or multimeter ensures the electrical circuit is became off earlier than installation. This prevents electrical shocks and confirms the outlet is functioning effectively earlier than plugging in the oven.
7. Wrench or Socket Set
Many built-in ovens use bolts or nuts for securing frames or brackets. A wrench or socket set helps tighten them properly. Using the proper device prevents stripping bolts and ensures a firm, steady installation.
8. Protective Gear
Don’t forget about private protection equipment.
- Gloves guard your palms from sharp cupboard edges
- Protection goggles hold dirt and particles out of your eyes when drilling
- Work boots with correct grip can additionally make lifting safer
Optional however Useful Tools
- Stud Finder – If you need to mount brackets to a wall, a stud finder helps discover studs for a invulnerable hold.
- Clamps – Handy for retaining trim portions or panels in location throughout adjustments.
- Appliance Dolly or Lifting Straps – A built-in oven can weigh over one hundred pounds. Using shifting gear makes lifting safer.
Materials Needed for Built-In Oven Installation
In addition to tools, you’ll additionally want sure materials:
- Mounting Screws/Brackets (often blanketed with the oven).
- Wire Nuts/Connectors for electrical connections.
- Trim Kit or Filler Strips to shut gaps round the oven for a expert finish.

Step-by-Step Overview of the Installation Process
To recognize how these equipment come together, here’s a simplified breakdown of the set up process:
Step 1: Measure and Prepare the Space
Use a measuring tape and degree to verify the cupboard cutout meets the oven manufacturer’s specifications.
Step 2: Shut Off the Power
Use a voltage tester to make positive the circuit is absolutely off earlier than coping with wires.
Step 3: Make Electrical Connections
Use wire strippers, pliers, and wire nuts to join the oven to the electrical supply, following the manufacturer’s wiring diagram.
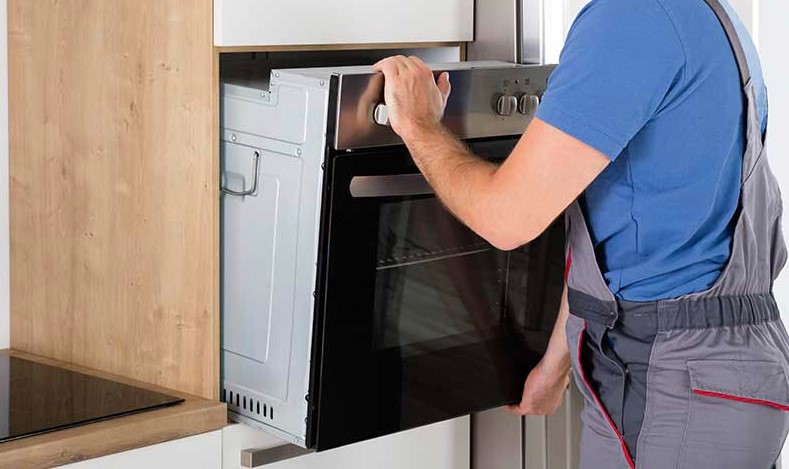
Step 4: Slide the Oven Into Place
With assist or a dolly, cautiously slide the oven into the cutout. Keep the stage on hand to alter alignment.
Step 5: Secure the Oven
Use a drill, screws, and maybe a wrench to impervious the oven to the cabinetry with the blanketed brackets.
Step 6: Test the Oven
Turn the strength lower back on and take a look at that the oven operates successfully earlier than finalizing trim and panel installation.
Safety Tips for Built-In Oven Installation

- Always flip off the circuit breaker earlier than working with electrical wiring.
- Use the chum system—ovens are heavy and awkward to cope with alone.
- Follow producer directions closely, as set up necessities range by means of brand.
- Hire a expert installer if you’re no longer assured with electrical work.
Should You Install a Built-In Oven Yourself?
While it’s viable to deploy a built-in oven with the equipment listed above, many house owners opt for hiring a professional. Here’s why:
- Electrical safety: Professionals are educated to deal with 240-volt wiring safely.
- Precision: An professional ensures your oven is flawlessly degree & flush with cabinetry.
- Time savings: A expert can whole the job rapidly barring trial and error.
Conclusion
So, what equipment are required for putting in a built-in oven? At minimum, you’ll want a measuring tape, screwdrivers, drill, level, pliers, wire strippers, voltage tester, and a wrench set. Add security gear, mounting hardware, and elective equipment like a stud finder or dolly, and you’ll be well-prepared for the job.
Installing a built-in oven with Premier Appliance of Augusta can be finished as a DIY project, however given the electrical and weight considerations, many householders select hiring a expert installer. Whether you do it your self or name in an expert, having the proper equipment on hand ensures a safe, efficient, and professional-looking installation.